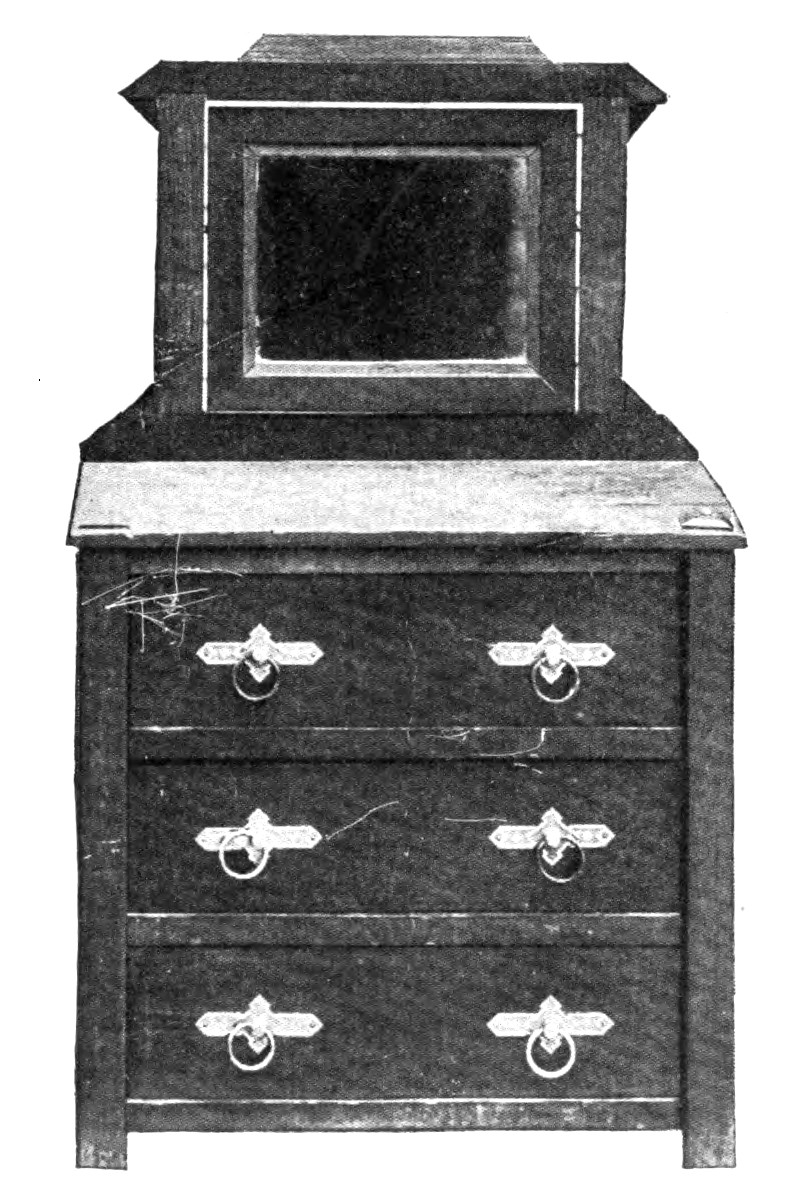
A
DRESSER FOR CHILD'S PLAYROOM
This dresser can
be made
of two kinds of wood as marked on the drawing or it can be made all
of one kind. The original dresser was made of oak and walnut and was
finished natural, the contrast between the light and dark woods
adding much to the value of the piece in the eyes of the little ones.
Have all surfaces that will show well sandpapered at the mill. The
following is a list of the material wanted:
4 oak posts, 1 1/2 in.
square by 19 1/2 in., S-4-S.
3 walnut drawer
fronts,
3/4 by 5 by 17 in., S-2-S.
8 yellow poplar
drawer
sides, 3/8 by 5 by 12 in., S-2-S.
3 yellow poplar
backs,
3/8 by 4 1/2 by 16 1/2 in., S-2-S.
3 yellow poplar
bottoms,
3/8 by 12 by 16 1/2 in., S-2-S.
4 oak front
stretchers,
7/8 by 1 3/4 by 17 1/2 in., S-4-S.
4 oak side rails,
7/8 by
2 by 12 in., S-4-S.
2 walnut side
panels, 1/4
by 11 by 14 1/2 in. S-2-S.
8 oak drawer
slides, 7/8
by 2 by 10 1/2 in., S-2-S.
8 oak drawer
guides, 1/2
by 3/4 by 10 1/2 in., S-2-S.
4 oak back
stretchers,
7/8 by 2 by 17 1/2 in., S-2-S.
1 oak top, 5/8 by
14 by
20 1/2, in., S-2-S.
3 sq. ft. of 3/8
in.
matched yellow pine ceiling for back.
MIRROR
SUPPORT
1 walnut piece, 7/8
by 1
3/4 by 20 1/2, in. S-2-S.
1 walnut piece, 7/8
by 1
1/2 by 18 in., S-2-S.
1 oak piece, 3/4 by
1 1/4
by 10 1/2 in., S-2-S.
2 oak pieces, 7/8
by 1
1/2 by 11 in., S-2-S.
1 walnut bracket
piece,
7/8 by 1 1/4 by 5 in., S-2-S.
MIRROR
FRAME PARTS
2 walnut pieces,
7/8 by
1% by 12% in., S-2-S.
2 walnut pieces,
7/8 by
1% by 103, in., S-2-S.
2 oak pieces, 1/4
by 3/8
by 10 in., S-4-S.
2 oak pieces, 1/4
by 3/8
by 8 in., S-4-S.
1 back, 3/16 by 8
by 10
in., soft wood.
2 cleats, 3/8 by 1
1/4 by
8 in.
1 plain mirror
glass, 7
1/2 by 9 1/2 in.
Begin by planing
the four
posts to length. The lower ends should be slightly beveled to prevent
their slivering. Cut the mortises for the tenons that are on the ends
of the side rails. These rails are to be T/8 by 2 in. and the tenons
should be 3/8 by 11/4 in. wide by 3/4 in. long. The posts should be
rabbeted down to their middles to a depth of % in. so as to receive
the 1A in. end panels. The end rails should be cut to length and
their tenons worked after one edge of each has been rabbeted as were
the posts.

Dresser
Complete

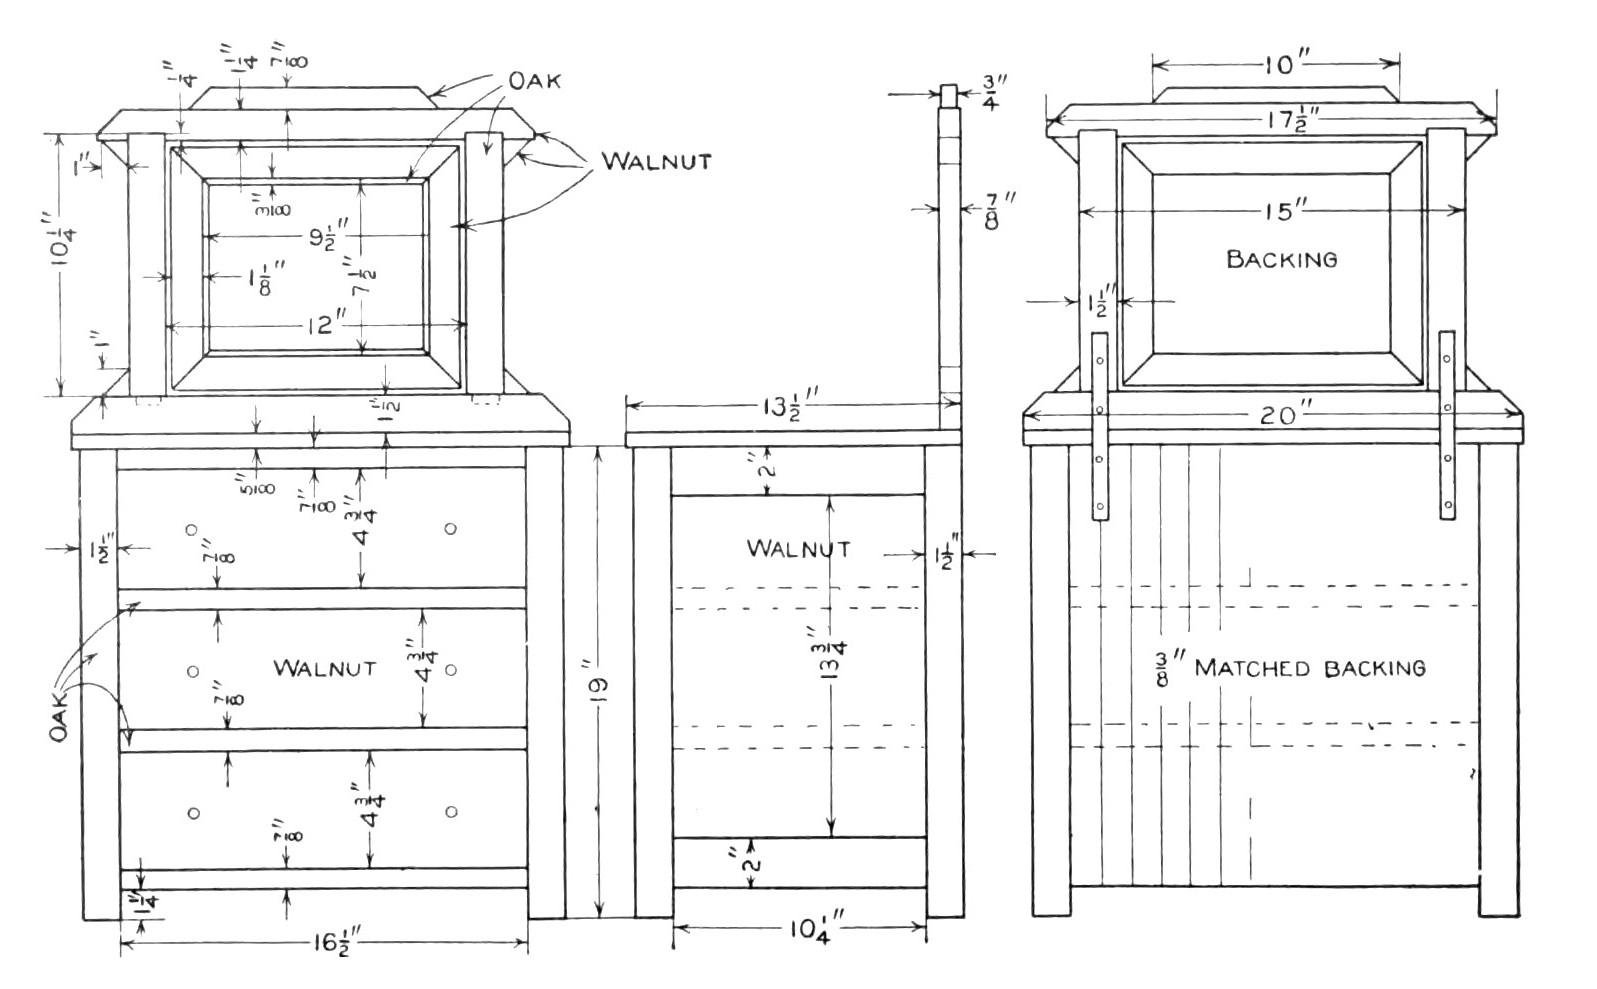
Details of Dresser
(click for larger image)
Having squared
the panels
to size, put the two ends of the dresser together with glue. Next
make the four frames which are to carry the drawers. They should
measure from outside to outside, in length 17 1/2 in.; in width, 12
1/2 in. It is intended that the short pieces shall be tenoned into
the long ones. When these frames are ready, cut out each corner as
indicated in the cross section drawing. Reduce to size the drawer
guides and fasten them in place. Dowel the frames to the ends of the
dresser in the places indicated on the drawing. Put on the back,
nailing into frames to the ends of the dresser in the places indiand
fasten the top in place, putting screws into it from the under side.
The mirror frame
and
support should next be made. The drawing shows quite clearly the
parts and their relation to each other. All the slopes are of 45 deg.
Instead of rabbeting the mirror frame, a 1/4 by 3/8 in. fillet of oak
is nailed around to form the recess, the walnut frame and oak fillet
making a pretty contrast. All nail holes are to be filled with putty
colored to match the finish. Wooden pins or round-head screws are to
be used to fasten the mirror frame to its support and should be
placed above center an inch or so.

The drawers are
to be
constructed in the usual manner. It is a good plan to make the
grooves 1/16 in. narrower than the stock is thick to insure a fit,
chamfering the under or back sides of the bJttom and back if
necessary. Make the sides of the drawers of such a length that when
the drawer has been pushed in as far as it will go, the front will he
recessed about 1/4 in. behind the front crosspieces. Groove the
inside of the drawer front 3/16 in. to receive the bottom. The mirror
should not be placed until the wood has been finished.
Finish the wood
natural,
apply three coats of varnish. Rub the first two with haircloth or
curled hair and the last with pulverized pumice stone and crude oil
or raw linseed oil. This gives an egg-shell gloss.
For a dull
finish, rub
the varnish after it has become bone dry with pulverized pumice stone
and water, using a piece of rubbing felt. Rub until the surface is
smooth and even, and clean with a wet sponge or chamois skin. If a
polished finish is desired, rub first with pulverized pumice stone
and water, then with rotten stone and water. Finish with a mixture of
oil and a little pulverized rotten stone.
|

